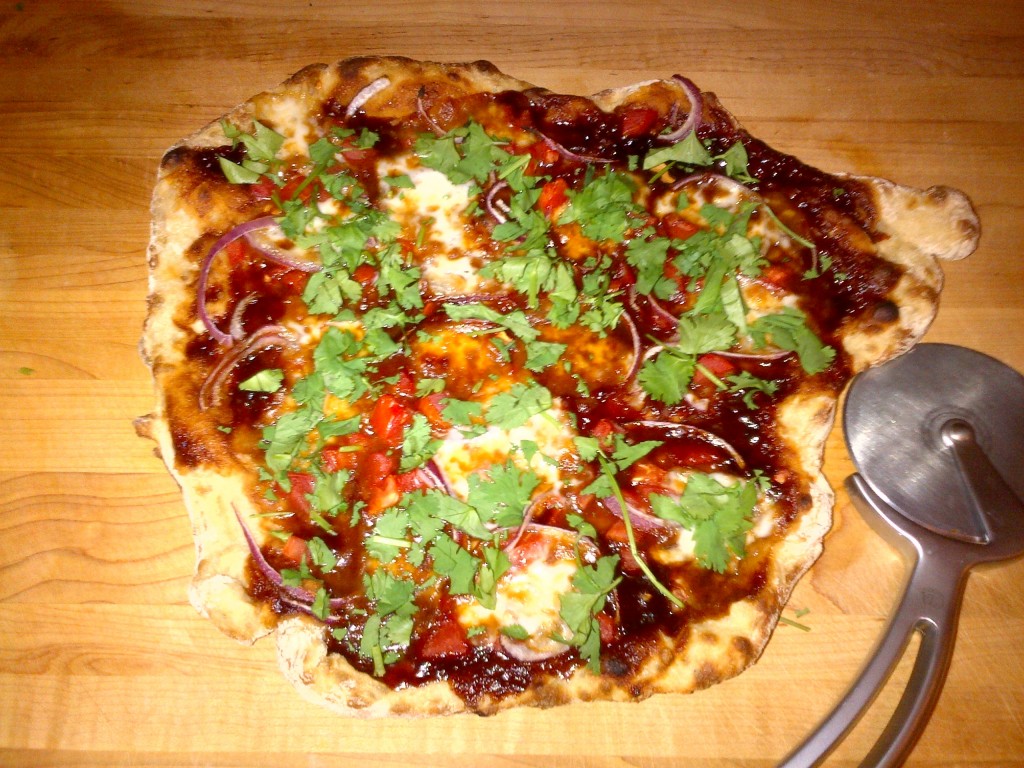
Even though I finally made a yummy pizza, I felt that there was a lot of room for improvement. I want a crust that is crispy and thin, yet moist and flavorful. You know, not floppy, but with parts of chewy yet airy dough. And I really want this certain taste and smell. You know, yeasty or something. Getting the pizza to be round? Well, that can wait, flavor it more important! So last week I tried again and while I didn’t get the “taste”, it was a pretty darn good crust. I even used 1/3 atta flour! Atta flour is Indian whole wheat flour. I think it is ground finer or something, as it is definitely softer that other whole wheat flours I’ve tried.
I am going to give you the instructions for the crust, but really, I am not there yet. This is more of a work in progress recipe. If you’re on a mission to also make a perfect crust, this isn’t where you should look! The recipe I used in my first pizza post is much more standard and a good place to start. If I ever get this down, I promise I’ll share it.
So I ran into these crazily complicated pizza instructions in my pizza crust search and thought, hey, I don’t have the simple crust recipes down, why not try something much more complicated and different? Why not try doing something called autolyse and wet kneading? How about throwing in some whole wheat flour too? I have no patience when it comes to learning things in bitty steps. This is, in general terms, why I have not become the baker that I aspire to be.
The Crust
1/4 cup water
1 teaspoon honey (apparently you don’t really need to proof yeast, but throwing in normal yeast (as opposed to instant) into dry flour scares me)
1 tablespoon active dry yeast
2 cups bread flour
1/3 cup atta flour
2 cups more water
2 teaspoons salt
2/3 cup more atta flour
- Heat the 1/4 cup of water and honey to ~105 degrees, add the yeast, and let it foam up on top.
- Combine the bread flour, the 1/3 cup of atta, and salt in the mixer and mix the salt in evenly.
- Add the water and yeast mixture and mix until a batter is formed. I used the regular paddle, not the dough hook because it wasn’t mixing evenly. Then I even took the bowl off the mixer and mixed it a bit by hand to get it evenly mixed.
- Let sit for 20 minutes. This is the “autolyse” part.
- Replace the paddle with the dough hook and mix on level 2-3 for about 5 minutes. This is the “wet kneading”. It is really wet, kind of like a thick batter.
- Slowly add the rest of the atta flour and mix for a few more minutes. It will still be really wet.
- Pour out the dough into an oiled bowl and let rise for a couple of hours. It doesn’t need to double.
- Split dough into two balls, flour, and refrigerate in containers that are bigger than the balls. One of my balls expanded the ziplock container to bursting, can you believe!
Make Your Pizza
This pizza is a bbq sauce style pizza, not to be confused with using a bbq to cook the actual pizza.
1 pizza crust
BBQ sauce (a nice hickory brown sugar one is always good – there is a nice Jack Daniels style and Trader Joe’s has a great Kentucky one)
Red onions sliced
Jack cheese in chunks (in the picture I used fresh mozarella, but we tried jack cheese for a quick pizza on our trip north- the jack cheese was better since it had more flavor and the flavor wasn’t drowned out by the BBQ sauce)
Cilantro
- 2-3 hours before making your pizza, but at least 24 hours after refrigerating your dough, take out a pizza crust and let it get to room temperature. I’ve mentioned this before, but I have to again, a yogurt maker
is a great way to speed up this process!
- An hour before baking your pizza, put your pizza pan
on the bottom of the oven and preheat your oven as high as it will go (ours goes to 550 degrees).
- Get all your toppings ready to go.
- Flour your work surface and the dough and try and stretch out your crust without breaking it (this part is hard for me, can you see how misshapen my pizza turns out!?).
- Carefully take out your pizza pan (it will be very hot) and try and get your crust onto the pan as evenly as possible.
- Add your toppings as fast as you can: bbq sauce first, then onions, then cheese.
- Pop the pan back into the oven, carefully and set your timer for 7 minutes.
- Voila! The pizza is almost done, just take it out and top with cilantro.


